To contribute to this wiki, please contact bikebikeeverywhere@gmail.com if you would like us to create you an account. The Contribute to this Wiki page goes into detail about how to make contributions and what information should be included.
Para contribuir a este wiki, por favor escribe a bikebikeeverywhere@gmail.com si deseas que creemos una cuenta para ti. La página Contribute to this Wiki explica en detalle cómo hacer contribuciones y qué información debe incluirse.
Diamond Handlebar Wrap
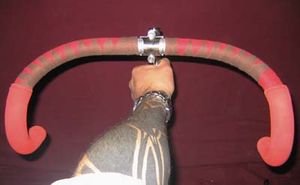
For a few years now I have thought that the diamond (sometimes called Harlequin) style handlebar wrap looked like a fun alternative. I have always been a fan of cloth tapes thin grip and positive feel in all weather, and this was a great way to not have to choose colors. I found directions on the net from two gentlemen; fixedrider’s article at fixedgeargallery.com and Jim Varnum’s article at wastedlife.org. Both are good, but seemed to lack a few intermediary steps for my brain. Most importantly, neither fully addressed how to match sides of the bar. It’s my hope that this tutorial fills in a few gaps, but if anything here is confusing, take a look at their work to see if it gels better with your learning style.
Select your goods
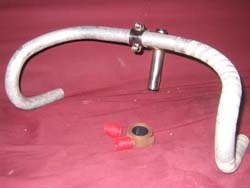
For this project I chose some funky French drops from the 50’s, an unpopular Ballistic ti stem and a half roll* of both red and brown Cateye cloth tape (I dig it more then Tressotar for no better reason then its Japanese and I am a dork, oh, and its more easily found in a wider range of colors). To cap it off I’ll use some cheap red Dimension track grips and brown Cateye expander plugs the same vintage as me. (Fig. 1)
Note: To do a full set of drops you will need 2 rolls of each color you use. I did a pair of 45cm bars to learn how, and am using up what I have left for this tutorial.
Getting Started
Note: My preference for this style wrap is to NOT have finishing tape or twine. As such, I started near the stem and worked my way south, letting the bar plug seal my ends. If you want to use finishing tape, start at the bottom and work up. No biggie either way.
- If you plan on using a single bolt stem slide it on and fix it now. I’m using an open faced two bolt, but slid it on so that I would have another visual reference and so that I could clamp it in my work stand if needed.
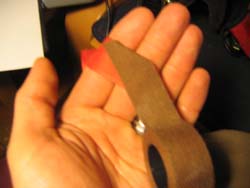
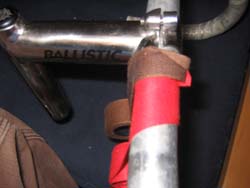
- Choose the color that you want to be the “base” and the color you want to be the “diamonds”. In this case, I am using brown as the base. Start by crossing the ends from each roll at a slight angle with the base color on top. Fold the tail over so that the sticky sides meet leaving you with the appearance of a taper. (Fig. 2)
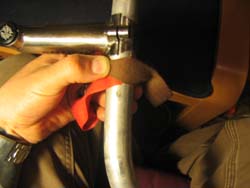
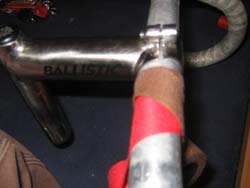
- Place this intersection on the top of your bars with the base color flowing off the front, the accent color back towards the stem. (Fig. 3)
Starting the pattern
NOTE: It is important to note that you do NOT overlap the same color tape at any time in this procedure; the tape flows with only its edges meeting.
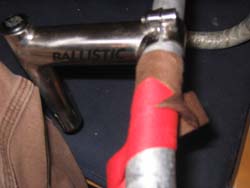
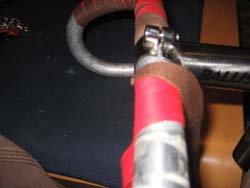
- Begin by wrapping the accent color (Red) under the bars, back up and over to finish on the stem side of the bar (where you started). Finish one complete wrap. (Fig. 4)
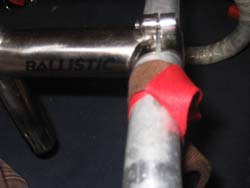
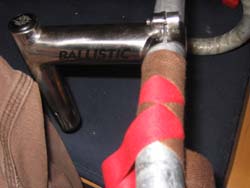
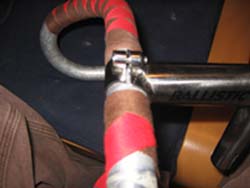
- Now wrap the base color (Brown) forward, under the bars and over the first half of the accent (Red) warp. (Fig. 5)
- Before you fully wrap the second half of the accent (Red), peel it back until the base (Brown) stops it. (Fig 6.)
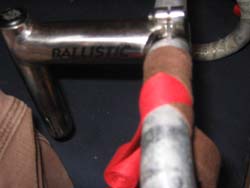
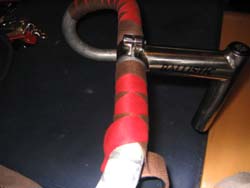
- Finish the last bit of the base (Brown) wrap, and then fold the accent (Red) down OVER the base layer. (Fig. 7)
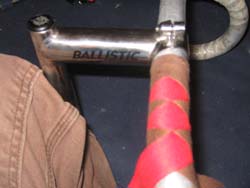
- Begin the second wrap of the accent (Red), peeling back the base (Brown) as you get to it and wrap under it (Fig. 8), just as we did a moment ago with the colors reversed.
- Wrap the base (Brown), peeling back the accent (Red) as you get to it and wrap under it. (Fig. 9)
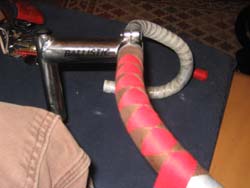
- At this point the patterns, both visual and production, have been established. Fig. 10 and 11 show the repetition of these steps.
- Keep doing this till you get either to the end or, as in my case, the place you wish to stop. If you reach the end of the bar, tuck in the tails and insert your bar plug.
If you wrap from top to bottom as instructed in this how to you face the problem of your tape peeling back as you put downward pressure on it. The proper method is bottom to top with twine or finishing tape at the end.
Matching sides
- Matching the sides was the most challenging part for me. On my first attempt I switched base and accent, and on my second attempt I had the pattern rotated and not matching. (Fig. 12)
- Here are a couple of quick tips to avoid that frustration. Do the EXACT SAME tape set up as last time. Do NOT switch tape sides, just spin the bars around. This time, the base color is on the stem side (but still my right when facing the end of the bar). (Fig. 13)
- Begin wrapping as before. (Fig.14)
- Wrap until there is one accent diamond. Check its position. If, as in Fig.12 you are rotated off plane from the first side of the bar, note the degree or percentage you are off and if you are off clockwise our counterclockwise from your goal. Unwrap, and reposition the stop opposite the direction you were off. Restart and check at the first diamond. If all is well, continue the pattern. (Fig. 15, 16)
Finishing
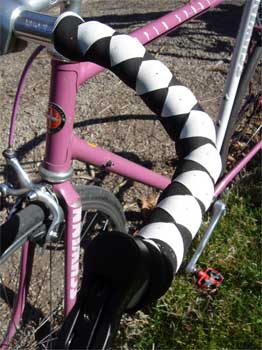
Congratulations! At this point your bars should be fully shrouded in funks diamond weave happiness! How to finish? I like expanding plugs, either Cateye, Velox or similar. They hold the tape well, and never seem to fall out by accident. Push the tail ends of the tape into the bar and run the plug in after. If you started from the bottom, finish with some form of finishing tape. Purists may scoff, but electrical tape in whatever color floats it for you works very, very well. A more “traditional” look is to wrap and finish in hemp or twine. The good folks at Rivendell have a good description of how this is done. Some folks paint on a few layers of varnish, but I’m not a fan of holding on to bug poop, so I’ve been finishing in 6-10 thin coats of Titebond III wood glue: totally waterproof, really durable, and never, ever coming off. For this write p I also slipped on a set of track grips for a fun bit of performance.
The sky is the limit here, and by no means are you limited to two colors. I think this would look great as a monochromatic pattern, and the good folks at Bikeworks flow in second and third pairings of colors. Have fun out there, with whatever style works for you!
- Edit* I used Eric's walkthrough to do my own handlebars, but for curiosity's sake I used normal cork tape instead of cloth. Cork works as well, it just ends up feeling like a tennis racket and it's a little more difficult to wrap as durably. Give it a try! (Fig. 18)
Contact
This is a work in progress (der, Wiki, n'est pas?) If something needs clarification, hit me up at Eric@slcbikecollective.org and I'll fix 'er.
